WOW, seriously, I may need help! I had good intentions of baking some sourdough banana nut muffins so I didn’t let my over ripe bananas go to waste. I really hate waste. I mean REALLY REALLY. Like oft times with good intentions it didn’t pan out and I fell asleep. It wasn’t a restful sleep but a sleep filled with bananas scolding me for being so wasteful. (no drugs involved here people). As the dream progressed, time (or the lack of it) became my enemy. The tic toc of the clock slowly became deafening. What to do? WHAT TO DO?? I know oatmeal is quick! Really Quick!! I WONDER???????
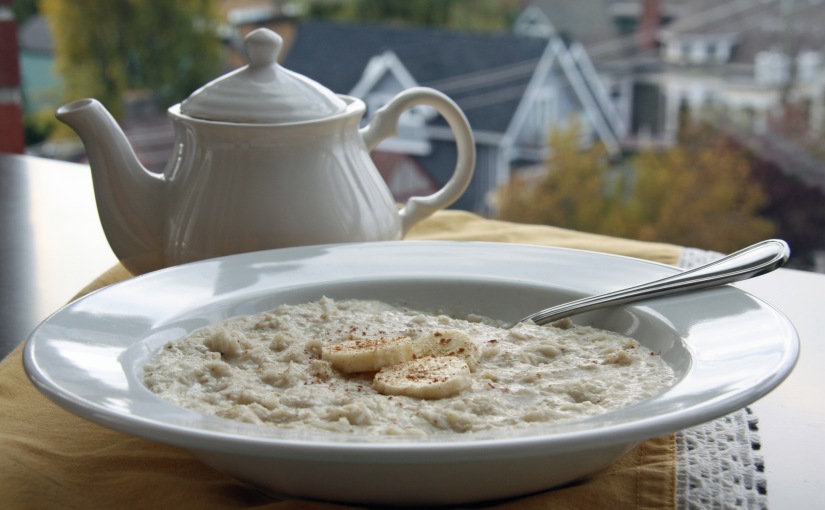
So guess what was for breakfast this morning. Maple Banana Nut Oatmeal. It was fast, hearty, healthy and delish! Although when my hubby came into the kitchen and watched me measuring the pure maple syrup into the oatmeal, he commented, “Hey take it easy with that stuff, maple syrup doesn’t grow on trees”… LOL. He’s a hoot.
Hot Banana Nut Oatmeal (not my picture)
INGREDIENTS:
1 cup 2% organic milk
1 cup non-chlorinated water
1 cup rolled oats
¼ cup real pure maple syrup
1 teaspoon organic vanilla
½ cup chopped walnuts
2 over ripe bananas peeled mashed and set aside
DIRECTIONS:
Put all ingredients except the mashed bananas into a medium sauce pan and cook until oatmeal is done. Stir in mashed bananas. Garnish with sliced banana or strawberries if desired. Serve warm.
Makes about 4 – one cup servings.
Enjoy! Here is one of my favorite quotes to start your day!!
“Peace is not the absence of turmoil but the presence of God”
I’ve been hearing a lot about a Keto Diet and thought “Well why not give it a try”. Before I embark on a full-fledged diet change I always experiment with recipes and if they pass the fussy husband test I add them to the list of select meals that make up the menu I choose from.
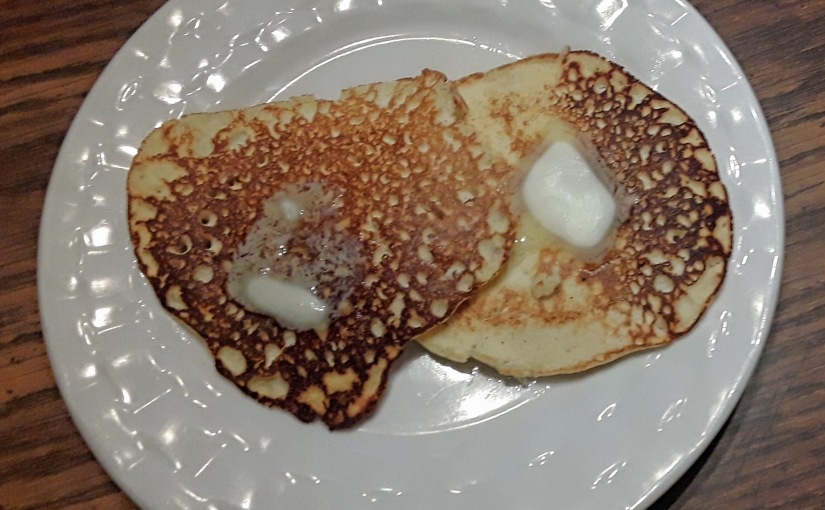
These passed the fussy husband test and its easy to make in the blender.
KETO FRIENDLY PANCAKES
INGREDIENTS:
4 oz. full fat organic cream cheese
4 large organic eggs
½ cup plus 1 Tbsp. coconut flour
1 ¼ cups organic milk kefir or buttermilk or coconut milk kefir
½ tsp. cinnamon
DIRECTIONS:
Put all ingredients into the blender and blend until smooth.
Heat griddle and coat surface with coconut oil. Pour batter onto griddle surface. Each pancake should be about 2-3 tablespoons of batter for optimal cooking. Cook 3-4 minutes on one side and gently flip and cook 3 minutes more. Serve with real organic butter and real pure maple syrup.
Enjoy! Here is one of my favorite quotes to start your day!!
“Peace is not the absence of turmoil but the presence of God”
Anyone that knows me and knows where I live, understands the constant battle to try and be self-reliant. I live in an area where the growing season is very short, the temperatures are chilly at night even in the summer months, and as wonderful as the abundance of wildlife is to watch, they raise much grief in the garden. They also know that my husband and I are very much opposed to waste. Why buy something when something someone else was discarding could be repurposed. This is a lifestyle from our childhood that has carried over to our adulthood. Being industrious because you were poor is now fashionable green living.
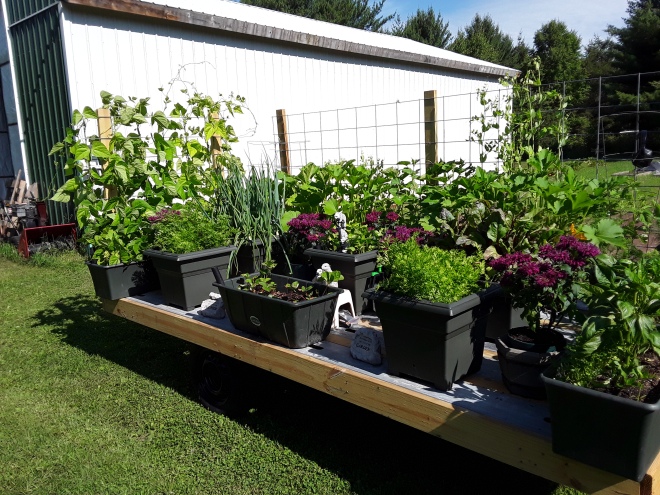
For Mother’s Day this year I got the best gift ever. My husband took an old rusty boat trailer and some galvanized construction headers that had been discarded at a construction site and some cattle panels and repurposed them into a mobile garden.
I’ve been using Earth Box self- contained planting systems from Earthbox.com for many years now to grow my lettuces and herbs and such but once they are full of soil they are really heavy and hard to move to mow around and if we got hit with frost or hail in June or even July it was a scramble to get everything covered.
This mobile garden is 6’ wide x 12’ wide and has 15 Earth boxes which will provide us with the fresh produce we will eat all summer. There won’t be enough for all my canning but I’m sure that we will make something larger if this pans out.
So far the benefits of the mobile garden are many. I planted a month early since I was able to pull it into our pole barn to keep it out of the frigid temperatures. I’m hoping to extend the harvest season the same way. The Earth Boxes each have a water reservoir so I don’t have to worry about under or over watering and there is almost no water wasted since it all goes to the plants. I don’t have to string out hoses since I can take the garden to the water source. I was able to plant the seeds, and pulled the few weeds that grew without stooping over. No bending to harvest either. If bad weather, strong winds or heavy rain is in the forecast, pull it into the pole barn. Best of all I pull it in to the pole barn at night so it’s not a salad bar for the deer and other critters.
The climbers were planted next to the attached cattle panels, and I used companion planting to maximize my limited space. I have special deep Earth Boxes designed for root crops.
We have pole beans, 2 varieties of tomatoes, Dill, snap peas, summer squash, table cukes and pickle cukes, zucchini, onions, parsnips, beets, red, yellow and green bell peppers, cilantro, parsley, basil, rosemary, 2 types of carrots and strawberries.
I added some bee balm to attract pollinators.
Below are pictures of the progression
This is 6 weeks out and everything is starting to bloom nicely.
We have a winner!!!!
Stay tuned for a update on the harvest…be green and peace out!
UPDATE: So far the harvest is awesome and much earlier than normal especially since everything was started from seed directly sowed outdoors. I will have to rework my companion planting, though as my squash shaded out my peas so I was unable to get a second bloom from the peas. NEXT Project? How about a mobile greenhouse!!
Enjoy! Here is one of my favorite quotes to start your day!!
“Peace is not the absence of turmoil but the presence of God”
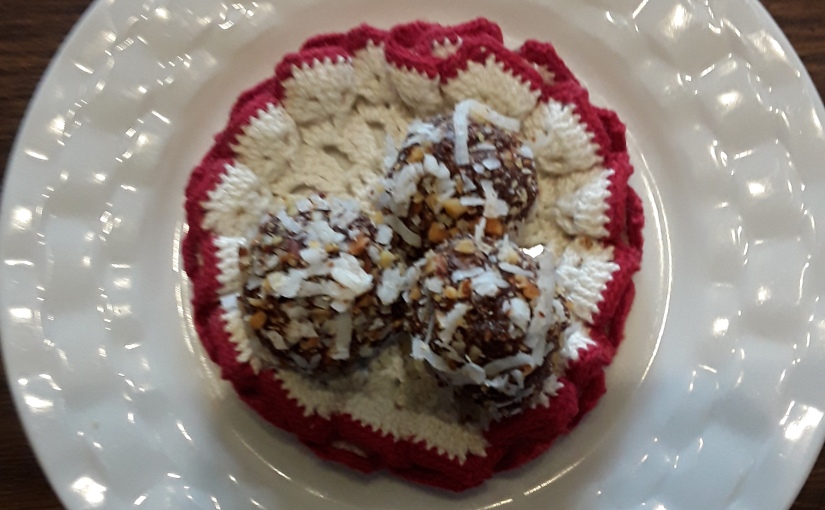
Times have changed so much since I was a kid. Children have so many choices these days that they’ve become fussier than ever. Recently our youngest grandson was diagnosed with a problem that plagues our family, Hypoglycemia. Keeping his blood glucose stable is crucial, so now I’m off on a quest to make high protein snacks that can keep his blood sugar stable throughout the day. This is a healthy, vegan, gluten free snack that can be enjoyed by all (except those with nut allergies of course). Simply mix, roll and chill then watch them disappear!!!
HIGH PROTEIN CHOCOLATE COCONUT ALMOND BALLS
Dry Ingredients:
2 cups gluten free quick cook oats
3/4 cup chocolate protein powder
1/4 cup organic coconut sugar
1/4 cup organic coconut flour
1/4 cup pitted minced dates
3 Tablespoons finely chopped almonds
2 Tablespoons cocoa powder
1/2 teaspoon sea salt
Wet Ingredients:
1/2 cup water plus 2 Tablespoons
3 Tablespoons almond butter
1 Tablespoon pure maple syrup
1 teaspoon organic vanilla
Coating Ingredients:
1/2 cup finely chopped almonds
1/2 cup shredded coconut flakes
Preparation:
Mix dry ingredients in a large bowl (preferably with a stand mixer with a batter paddle as dough will become very stiff). Add wet ingredients and mix well. Roll into 1 inch balls and roll each ball in the coating mixture. Place on a parchment lined dish and refrigerate for a couple of hours. Store any leftovers in a covered container in the fridge.
Makes 24 balls.
Enjoy! Here is one of my favorite quotes to start your day!!
“Peace is not the absence of turmoil but the presence of God”
Anyone who has ever grown zucchini squash knows how prolific it can be. After you’ve had your fill, and your pantry and freezer are well stocked and you have given your friends and neighbors all they could eat you’ll find you still have an abundance of left over zucchini. Short of using them for skeet shooting, what to do?
Well, it’s time we think outside the traditional zucchini box. When they ‘re young we sauté them and fry them, turn them into pickles, breads, muffins etc. but once they get too large the centers are stringy, the rinds are tough, what now? Compost?
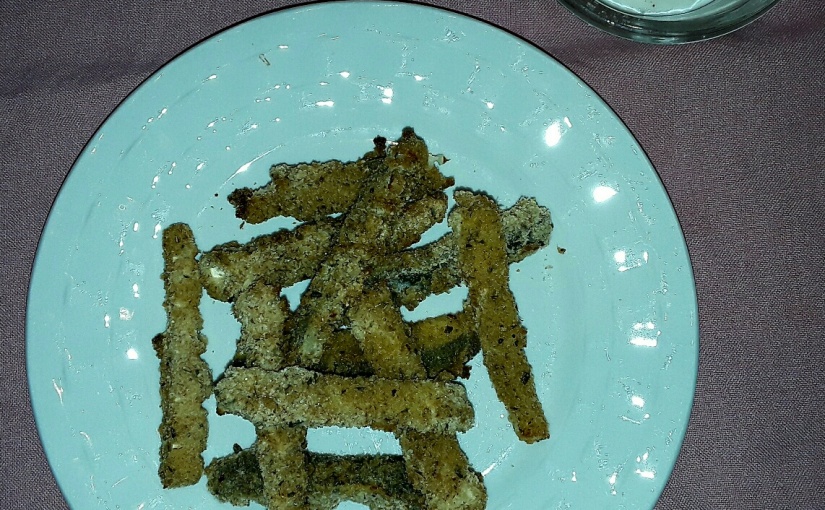
Fall is the time for savory flavors so I vote we make some healthy zucchini fries.
HEALTHY ZUCCHINI FRIES
INGREDIENTS:
1 large zucchini
Salt
Seasoning of your choice (I use Lawrys)
Cooking spray or olive oil to brush on fries.
DREDGE INGREDIENTS:
Buttermilk or kefir or egg
Organic flour (I’m sure gluten free flour would work if gluten is an issue)
Bread crumbs (panko or Italian or homemade, your choice)
Healthy Zucchini Fry Ingredients
DIRECTIONS:
Wash and slice the fleshy part of the zucchini into ¼ inch sticks 2-3 inches long. Compost the pithy center. Line the zucchini sticks on paper towels and sprinkle lightly with salt to draw out moisture. Leave set for about an hour. Pat zucchini sticks dry with another paper towel. Dredge the zucchini sticks in the flour, then the buttermilk, then roll in the bread crumbs and place them on a baking rack on a baking sheet. Bake at 375 or 15 minutes, then remove them from oven, spray lightly with cooking spray, turn the fries and lightly spray the other side. Return to oven for an additional 15 minutes, remove from oven and season with your preferred seasoning. Serve with your favorite dipping sauce. I love these paired with my kefir ranch dressing. YUM!! Tasty and healthy and kid tested and approved.
375 degrees, 30 minutes.
Enjoy! Here is one of my favorite quotes to start your day!!
“Attitudes are contagious, Is your worth catching?”
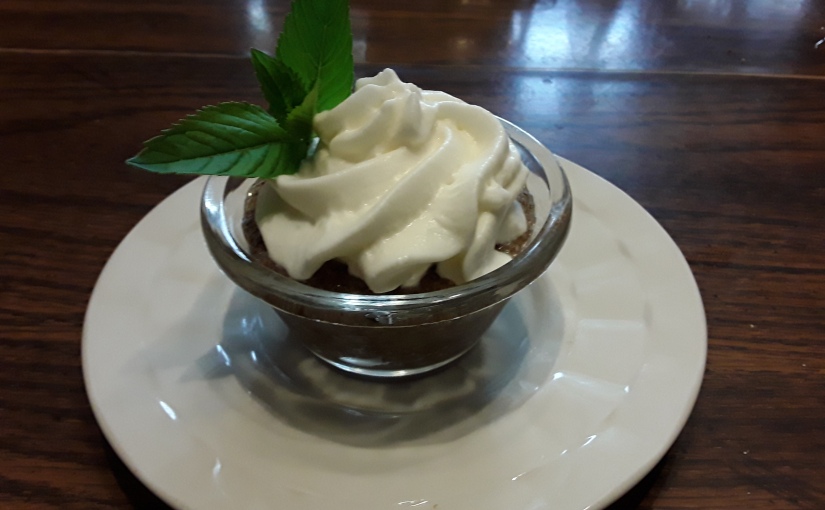
Last year was we had a beautiful summer but as much as I love the summer I hate the way cooking heats up the whole house, so I set out to find and/or create simple easy healthy no cook recipes for the summer months. Simple? Easy? Healthy? No Cook? And Tasty? Yup, I won’t settle for anything less on my blog. If it’s not tasty why bother making it. I’ve read so many recipes on chia pudding and how good it is for you but most were with nut milk. I didn’t have any of the ingredients around except the chia seeds. That said, I did notice the 5:1 ratio of liquid to seeds. So I thought, since I’ve got some left over apple juice I’d give that a try. It turned out delicious and it was so simple. If you can stir you can make it and a half cup makes a “stick with you” breakfast cup. It’s a great make ahead dish to grab when you’re in a hurry, just put it in little ½ cup jelly jars, cover and store in the fridge.
Apple Pie Chia Seed Pudding
INGREDIENTS:
1 ¼ cups apple Juice (I make my own and preserve it in mason jars)
¼ organic chia seeds
2 tablespoons real maple syrup
½ teaspoon organic ground cinnamon
½ cup of applesauce or chopped apples or walnuts (optional) whatever you like
Whipped heavy cream sweetened with maple syrup (optional) (Omit for vegan)
Apple Pie Chia Seed Pudding Ingredients
DIRECTIONS:
Put the apple juice, chia seeds, maple syrup and cinnamon into a medium bowl and stir until there are no clumps. Cover and put in fridge overnight. Stir in optional fruit and/or nuts. Serve with maple whipped cream and a sprinkle of cinnamon.
Makes about 4 – ½ cup servings.
Enjoy! Here is one of my favorite quotes to start your day!!
“Peace is not the absence of turmoil but the presence of God”
Ode to a Curious Mind: Ginger Root as a Houseplant!
The greatest gift one can have is a curious mind. The person with a curious mind is never bored and happy to find new adventures and discoveries and even re-discoveries. Industrialization had caused artisans and craftsmen to fall by the wayside but curious minds will never be out of style!
For me a simple thought of “I like bread” can lead me on a remarkable journey! 1. Learn to make bread. 2. What’s in bread? Flour, Water, Oil, Sugar, Salt, Yeast! 3. What kind of bread has simple ingredients? Sourdough! Starter, water, flour, sugar, salt. 4. Can I make my own starter? Yes Flour and water and time. 5. Can I make my own flour?……. and so on and so on….
My Daughter-in-law was here recently and I shared with her the ginger bug recipe from Wellnessmama.com. While she was here she made homemade ginger ale. YUMMY and refreshing!
Ginger ale is just Water, sugar, ginger root, molasses, lemon juice, ginger bug and time. So this started me thinking (can you hear the gears turning). Why can’t I grow my own Ginger root? After all, it’s a rhizome just not a hardy rhizome.
Ginger needs to be above 50 degrees year round and I live in the Upper Midwest so we only have about 3 months a year where it almost never gets below 50 degrees and it takes longer than 3 months for Ginger to mature. So I immediately thought “Why not make it a house plant?” Houseplants help keep the air in your home fresh. Ginger is therapeutic, has medicinal properties, as well as culinary benefits and frankly I LOVE THE SMELL. So it’s a WIN WIN WIN situation. And here the journey begins!
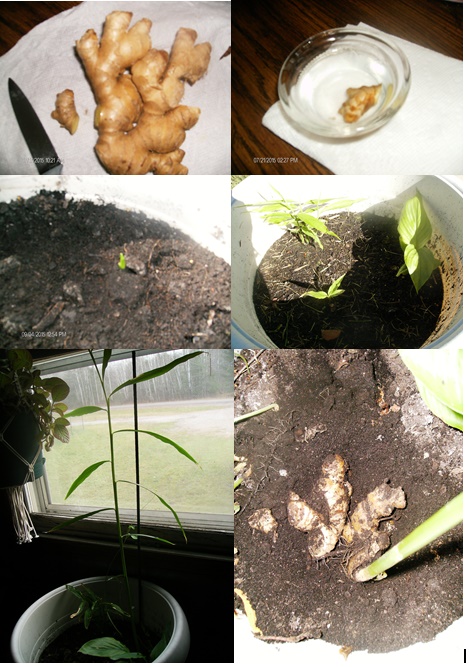
Growing your own ginger root indoors as a consumable houseplant:
Purchase a fresh ginger root from your food co-op for grocery store.
Cut off a Knob of ginger that has buds protruding from it.
Soak the knob of ginger in water for 24 to 48 hours.
Prepare a large pot with drainage rock and potting mix.
Bury the ginger knob just below the surface bud side up, put in a window with diffused light and water.
Don’t overwater, care for it as you would any other houseplant.
A ginger plant can get up to 4 feet tall. When the plant becomes mature, remove it from the pot (Save your dirt just add nutrients and reuse) and propagate a piece of the rhizome to start another plant. Start one every couple of months and you’ll never need to buy ginger again! Just remember that Ginger is slow to mature and the rhizomes you produce in you pot will not be as large as those commercially grown. You will most likely need a large space to keep several plants. See photo progression below.
Enjoy! Here is one of my favorite quotes to start your day!!
“Peace is not the absence of turmoil but the presence of God”
I live in the Upper Mid-West which is zone 3- 4 for planting which basically means that if I want to grow anything that takes more than a couple of months to mature I need to do a lot of planning and prep work. I’m starting my vegetable and annual herb plants that take 90 days or more to mature in a mini green house with a small heat lamp hung inside that I turn on to keep my plants warm on nights when the temperature is below freezing. Setting the heat lamp to come on with a thermostat set to 40 degrees works great (no worries if the temp drops when I’m fast asleep). I like this method better than starting the plants indoors because the young plants get conditioned early and don’t get shocked as easily when transplanting them into the garden. Today happens to be April 21st 2017 and even though we are in a fruitful period we are in the last phase of the moon (lunar cycle) so it’s fruitful for below ground crops. I’m experimenting with planting above ground crops during this fruitful time because I will be controlling the water table for my plants since they are contained. I’ve modified some used plastic containers (water bottles) from my recycle bin to try and keep it out of the landfill for a bit longer.
I cut the bottom 1/3 off the water bottle, removed the cap and inverted the top portion into the bottom. The bottom will store the water the inverted top will house the soil. I packed dirt into the neck to form a soil plug. This will act as a wick and pull the water below into the soil above as the plant needs it. This will help provide a more consistent moisture level and help prevent damping off of the sprouts. I take the top 1/3 of another water bottle with the cap removed and use it as a mini greenhouse. When the seedling reaches the top of the dome it’s time to remove the top.
Reusing Water Bottles – Figure 1Reusing Water Bottles – Figure 2Reusing Water Bottles – Figure 3Reusing Water Bottles – Figure 4Reusing Water Bottles – Figure 5Reusing Water Bottles – Figure 6Heirloom Corn Seeds – Figure 7
I planted my heirloom corn today because heirlooms take longer to grow than hybrids. I will be planting corn again on 4/29/17 because that is another fruitful period but we will be in the first phase of the lunar cycle and that is great for above ground crops. I want to compare the difference growth between the two lunar cycles.
I hope to post updates with progression photos to this post as the season move forward. Hopefully, I will be able to capture it all the way through to the harvest of next years’ seed.
I also used come yogurt containers to start my Bloody Butcher tomatoes!!!!
Bloody Butcher Tomatoes in Chobani Containers
Enjoy! Here is one of my favorite quotes to start your day!!
“Peace is not the absence of turmoil but the presence of God”